Jayco Silverline Shower Base Replacement
Ok – if you own a Jayco Silverline then you know the problem!
The factory shower is thin moulded plastic, it moves underfoot and eventually cracks. (I understand this has finally been remedied on the 2023 models). I tried to get mine fixed when in the Gold Coast at Ronic caravans as he seems to have developed a method that works well, but we couldn’t get in. I spoke to local West Oz repairers and no one seemed interested in a job like this. Clearly they haven’t owned a van like this or they would have worked it out by now.
As expected, ours cracked in a few places so I began my ‘fixes’, initially by injecting expanding foam from underneath, hoping to fill the cavity and solve the issue. However I lifted my weights off the shower too soon and got a bit bulge towards the middle. Not ideal…
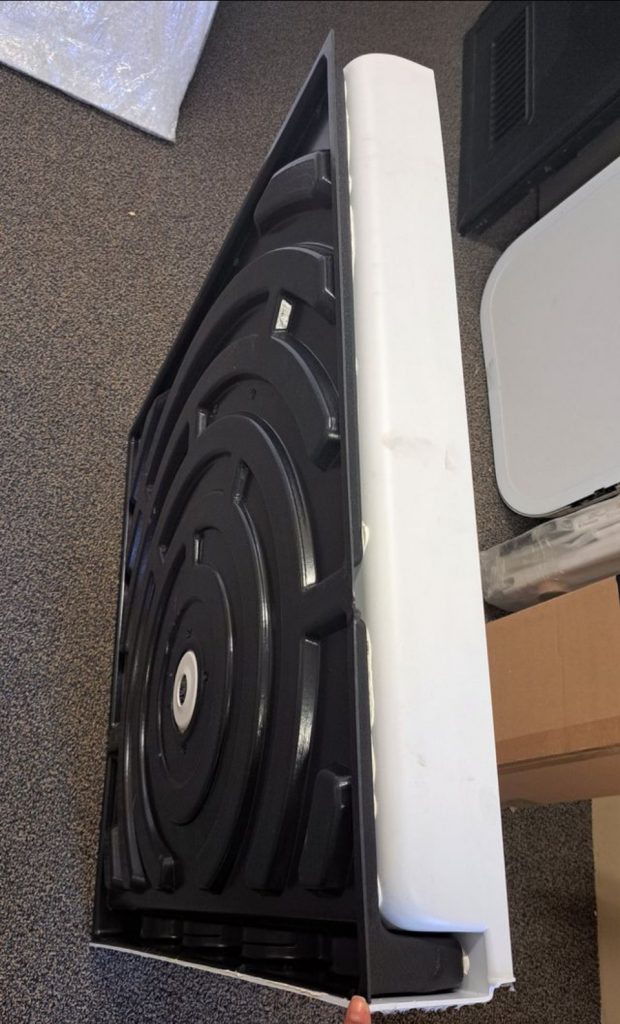
I then bought a product called Shalex and applied it to the base. It is the grey colour you see in the pics. It was difficult to tell if it worked, but either way I had a bloated, creaky showerbase and I had had enough! The images below are the original Jayco showerbase for sale on FB marketplace for $450. Not cheap…

I then discovered a bloke on the Silverline Facebook page who had done a DIY upgrade. I had considered this numerous times, but couldn’t figure out an easy way to get fall in the shower base.
His plan was simple. Remove the old then build up the floor level with plywood, buy a shower base from Bunnings and then fit it on top of the ply.
So here are some images of the process with comments alongside for clarity.
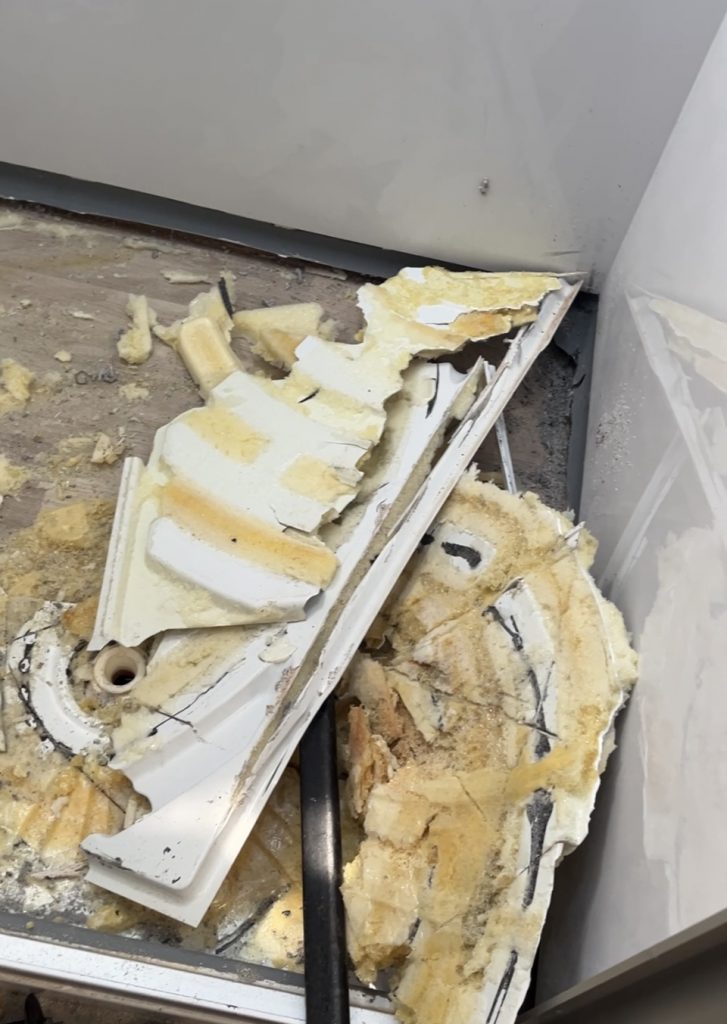
The original floor above with the angle grinder I used to cut out the base. My tip is leave the ‘walls’ of the base in where you can so they form a connection with the new floor.

I began with angle grinder and a screwdriver / crowbar. You can see the expanding foam in the old base. It took around 90 minutes to get it out and clean the area up a bit.
Tip -close the shower door while ripping it up and wear a mask. You will stop the plastic dust going thru the entire van and you will avoid inhaling a pile of nasties
I removed all the existing shower base and cleaned the area up.

From here it was a case of building up the levels to suit using plywood. I used 2 x 18mm boards and this seemed to be a perfect height.
Then comes some hole drilling and aligning of plastic base.
The base has a 120mm drain area that drops by about 20mm, so you need to find the centre of your plywood and locate the base there.
Tip – I used a 140mm holesaw so that there was some room for movement if I didn’t get the shower base perfectly lined up. This came in handy when I realised I had drilled the hole 50mm for the drain right against a structural beam. That 20mm of ‘give’ allowed me to make it work.

I measured and then dropped in some plywood. A good tip is to create 3 pieces of wood to slot in rather than trying to get one perfectly accurate. These will be your base and invisible. By using three pieces you are also ensuring you aren’t wrestling against the door to get the floor in and out. I did this with the first piece and then learnt from that
Drill your holes… Think carefully about the widest point that you need a holesaw to cater for.
I drilled a 140mm hole in the middle to allow for some lateral movement of the base if needed. Then I drilled a 90mm hole in the original floor to cater for the fittings that would be going thru.
I then took the shower base, an estilo from Bunnings ($155) and cut it to size. I erred a little on narrower rather than wider. It turned out almost perfect.
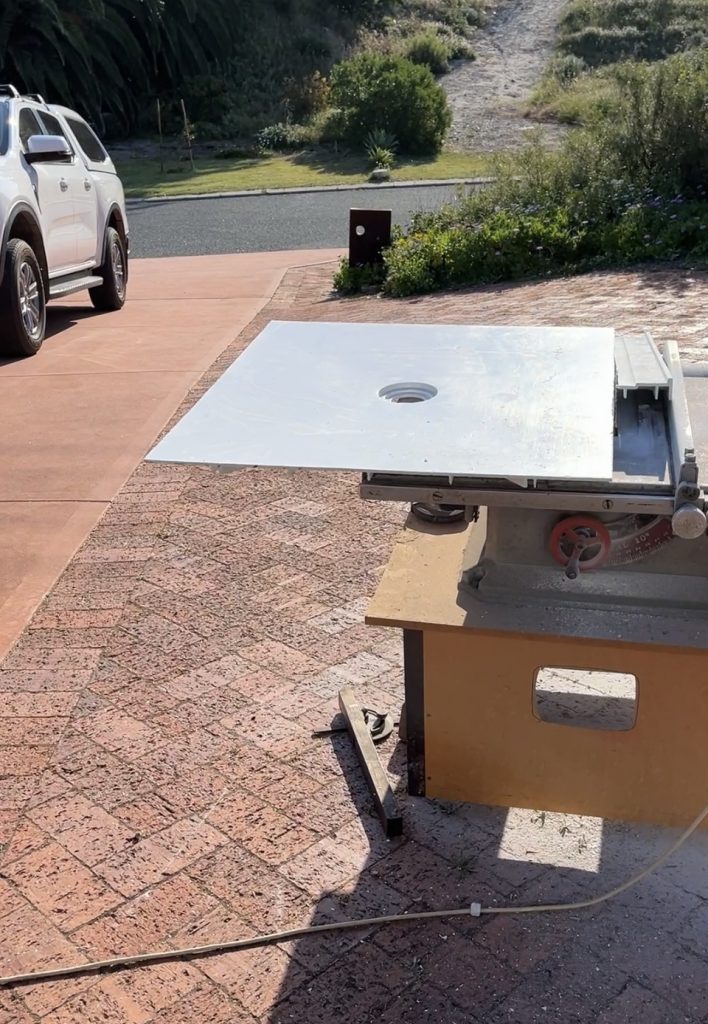
I probably needed a finer blade on the saw as there is a little bit of chipping around the edges of the shower. Not a big deal.
In this pic I am testing the waters to see if my base fits. It was fine. I had the use of my dad’s old bench circular saw which made getting straight cuts a lot easier.
I installed the second layer of plywood in 3 pieces, screwed them down and then went back to assembling the drain / outlet side of things. I was very fortunate to have once had a retic business so it was about to come in handy. The shower drain threadn is 50mm, so I bought a 50mm (female) to 25mm (female) threaded reducing coupling. I then added a couple of other fittings to make the connection to the existing pipework.
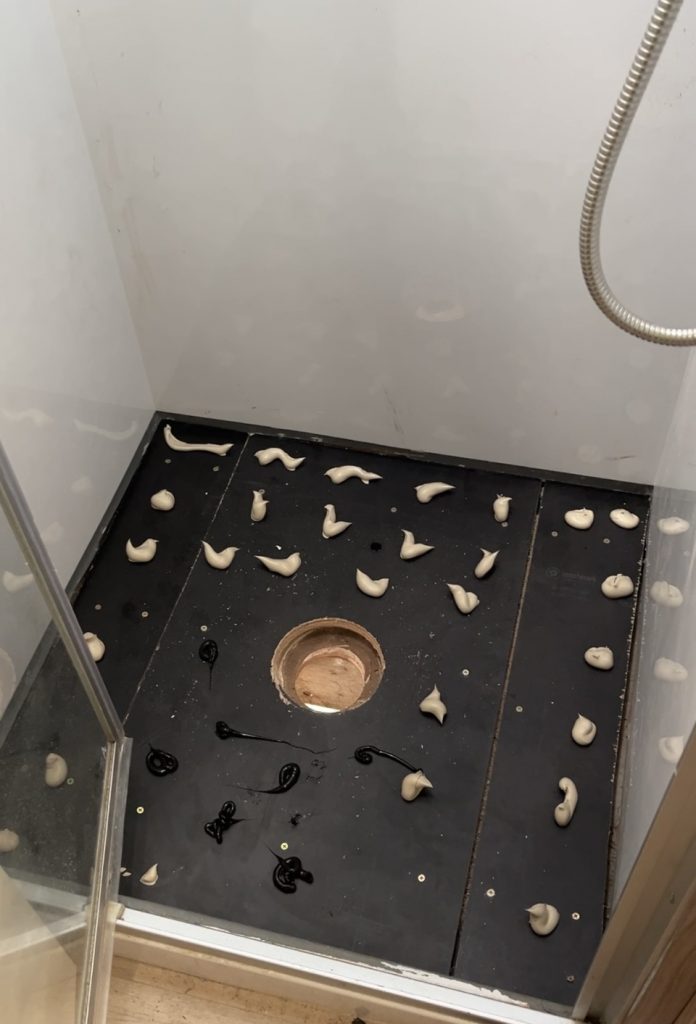
Then it came time to take the plunge and lock it in place. The plywood is screwed down but the shower is held in place with liquid nails (and a bit of black adhesive silicone when I ran out of liquid nails.)
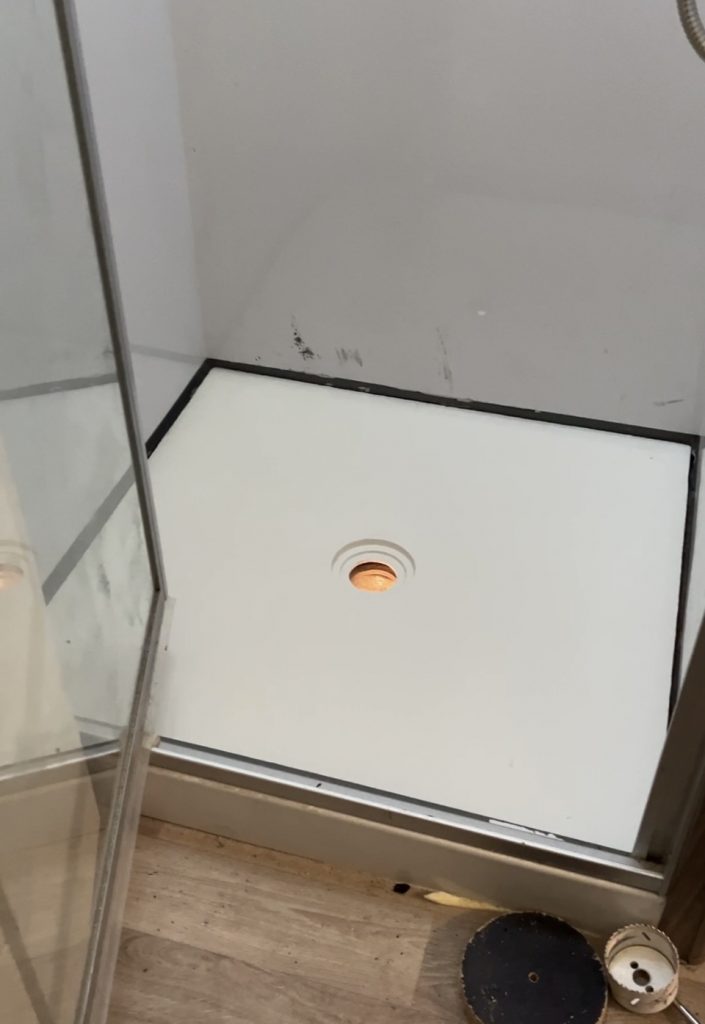
Once in place the rest was about siliconing the edges. I ended up having to fill some wider gaps with silicone but in the end it all worked out fine.
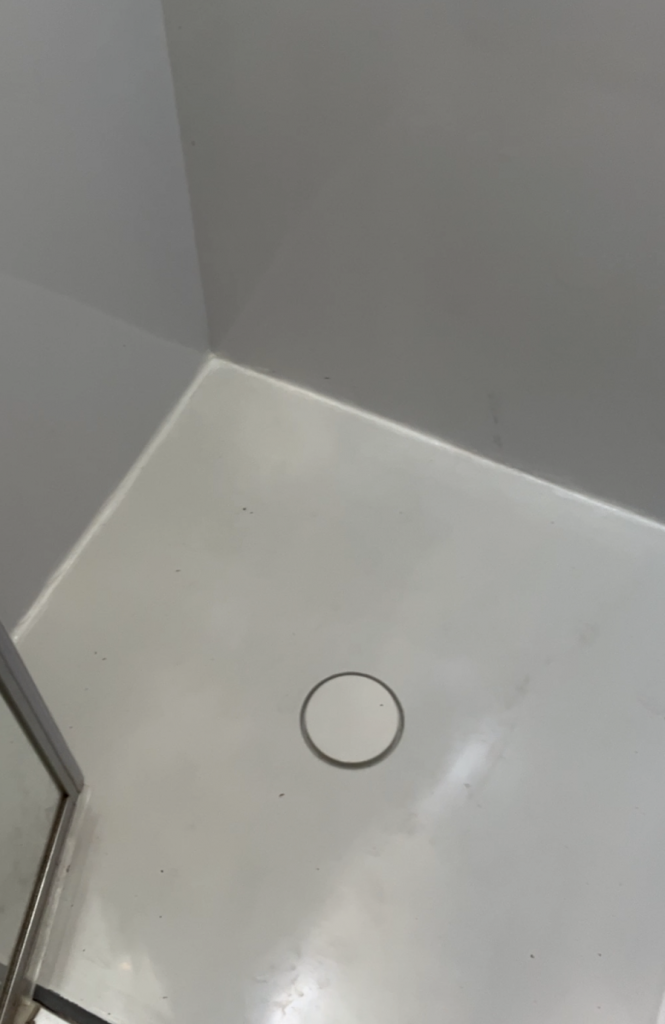
Here’s a pic of the final product.
In the end it took me 8 hours and about $300 in materials.
What would I do differently?
- I’d get a finer saw blade – the circ saw definitely was a bit rough
- I’d cut the ply in 2 or 3 sections to avoid the obstruction with the door.
- I’d remember to include the nuts around the drain plug in my equation for the size of my hole saw 🙂
- I’d cut my ply wood bigger and have less gap at the sides. I filled it with silicon, but I’d have [preferred a neater fi
- I’d do it sooner!
If you need one done then I’d be happy to consider it. I specialise in caravan weighing, diesel heaters and WiTi security, but I’m sure there are plenty of dissatisfied Silverline owners in WA who would love a solution to the cracking shower base issue, so I may be able to add it to my list of services.
(Credit to Mark Gamble for the original idea)
5 Comments
Fantastic job mate. I have a 2018 SLOB. Shower base holding up but I interested to know if you come up with a price. Apparently Ronic caravan repairs in Qld are starting to send out their Shower base upgrade. Have you seen what they do? Would be a good earner as they supply a Shower base to fit.
Hi Joel – I think I’d have to do it on an hourly rate (which is $150 + GST) and parts on top. I took 8 hours but I imagine I could nail that tighter with a few under my belt.
Brilliant Andrew
We recently purchased a Silverline and the previous owner had the floor “repaired” by a fibreglasser who installed a new floor over the old one. Cosmetically it is great but it still creaks when we use it. I guess I’m going to have to follow your example sooner rather than later. Thanks for the information.
Yeah – a friend suggested just tiling over it, but I thought it would be risky for that reason
I have done the same base. I would suggest when cutting down the new base to size, leave the original base border on one side. Make this go to the wall opposite the door, this will allow the new drain hole line up with the original floor waste hole. It doesn’t look out of place.
I wish I’d realised this before doing mine lol.